How to Make a Fillable Form in Excel (5 Suitable Examples)
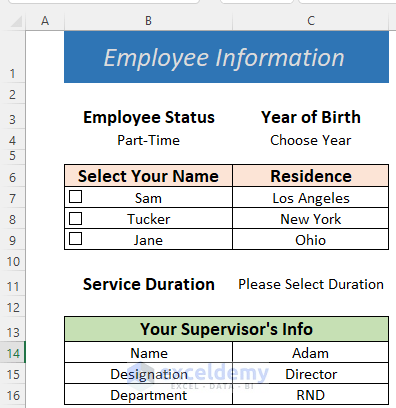
Here’s an overview of how you can use a fillable form in Excel.
How to Make a Fillable Data Entry Form in Excel: 5 Easy Examples
Example 1 – Making an Excel Fillable Form for Employee Information
- Make a rough template like the following picture. This doesn’t contain any formula or code.
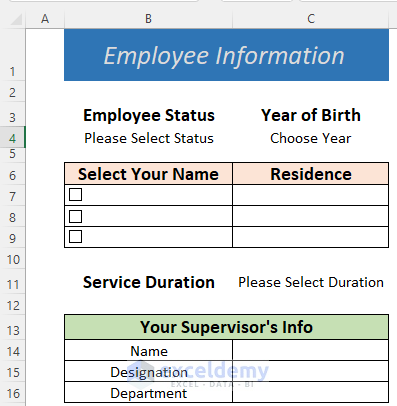
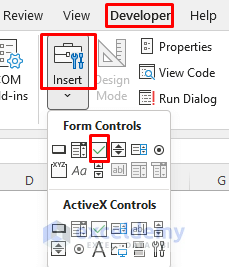
- The dataset contains some Check Boxes. To insert them, go to Developer, choose Insert, and select Check Box from Form Control.
- Put them in the name column same as the above picture.
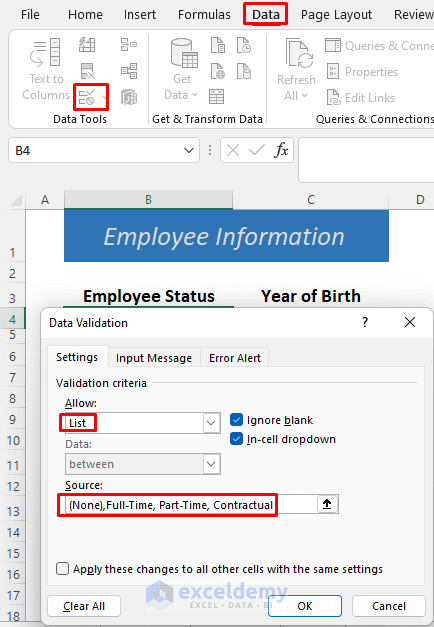
- Make a list for the Employee Status. To create the list, go to Data and select Data Validation.
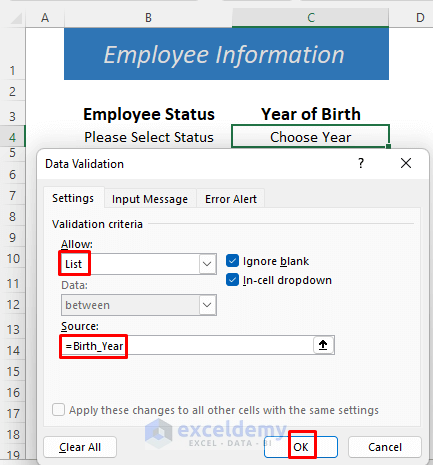
- Select List from the Allow: section and type the Statuses in the Source field.
- Click OK.
- Create another list for the Year of Birth. We used a named range for the year from Sheet2.
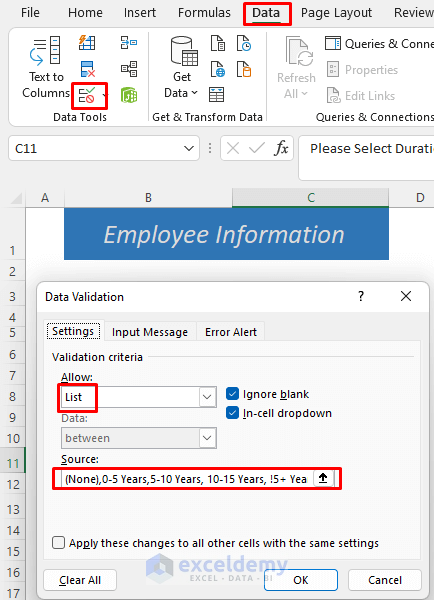
- We created a Data Validation list for the Service Duration of the employees.
- Use the following formula in cell B7 and press Enter. The named ranges are from Sheet2.
=IF(B4="Part-Time",Part_Timer,IF(B4="Full-Time",Full_Timer,IF(B4="Contractual",Contractual,"")))
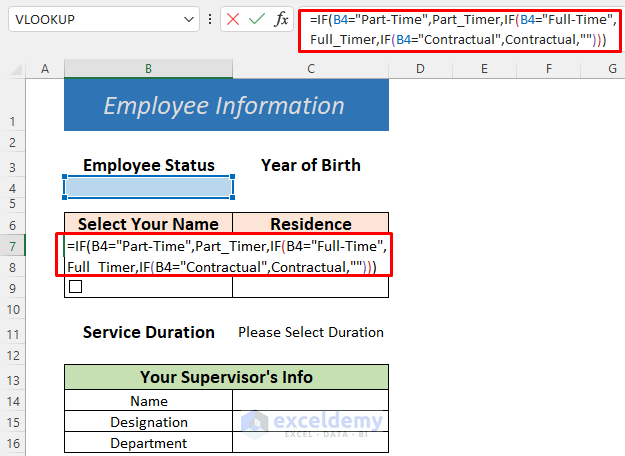
This formula uses the IF Function and will return the names of employees based on their status. If no status is selected, it will return nothing.
- Use the following formula in cell C7.
=IF(B4="Part-Time",Residence_2,IF(B4="Full-Time",Residence_1,IF(B4="Contractual",Residence_3,"")))
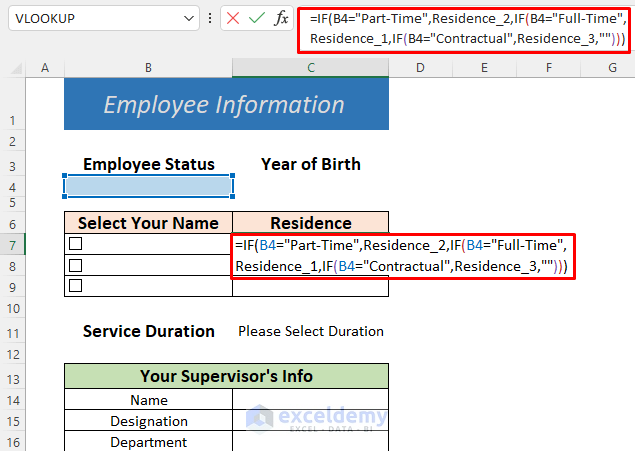
This formula will also return the residences of selected employees based on their status. This formula also has named ranges Residence_1, Residence_2 and Residence_3 from Sheet2.
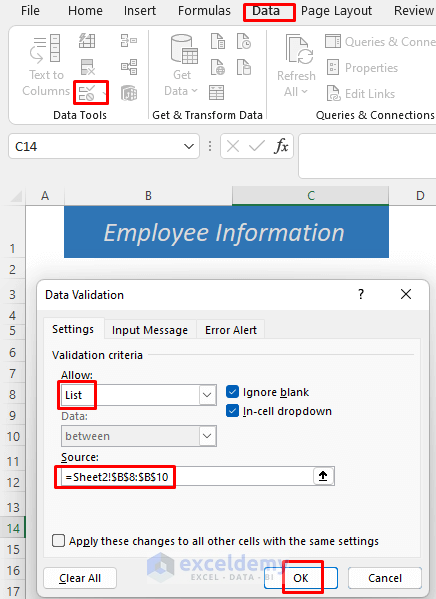
- Make a list for the supervisor’s name. The Source reference can be found in Sheet2.
- Use the following formula in cell C15.
=IF(C14="","",VLOOKUP(C14,Table1,2,FALSE))
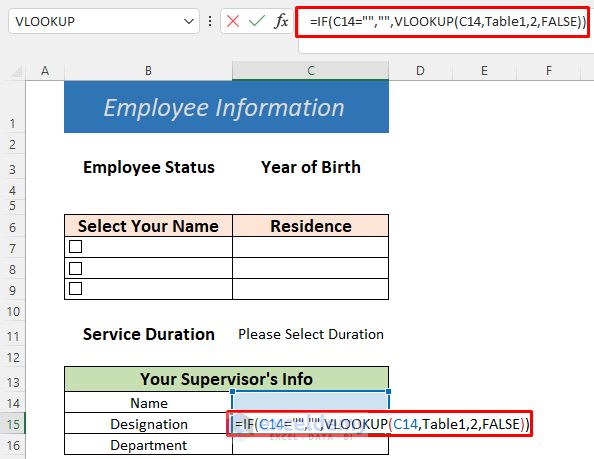
The formula uses the IF and VLOOKUP Functions and will return the Designation of the supervisor based on a name. You can find their name in a table of Sheet2.
=IF(C14="","",VLOOKUP(C14,Table1,3,FALSE))
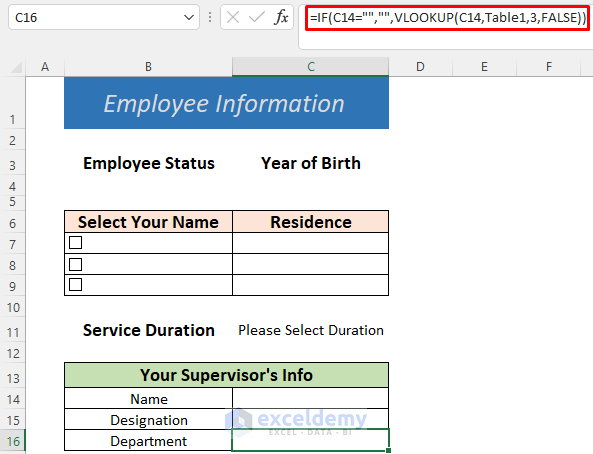
This will return the Department of your supervisor based on his name.
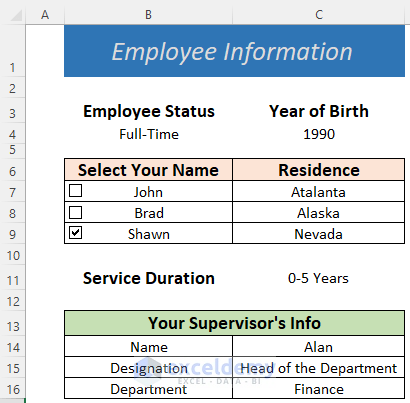
- Your fillable form is set.
- If you want to put more data, you can use a similar formula or named ranges or a Data Validation list.
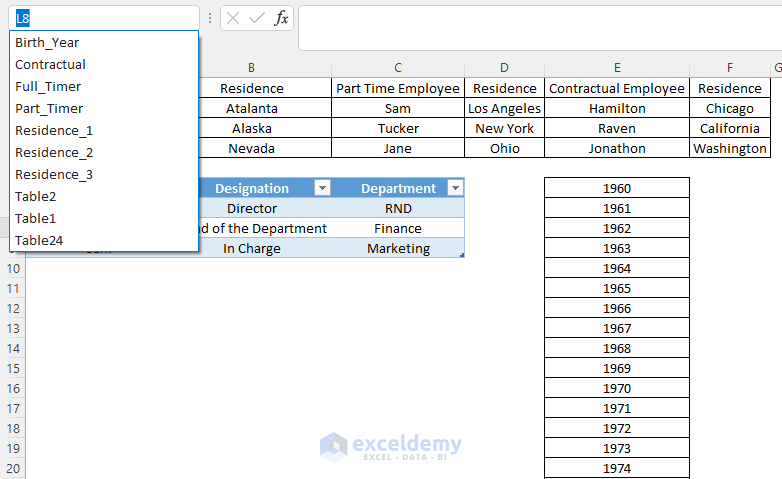
Here’s an image of named ranges in Sheet2. The Year column has more data below and contains all years.
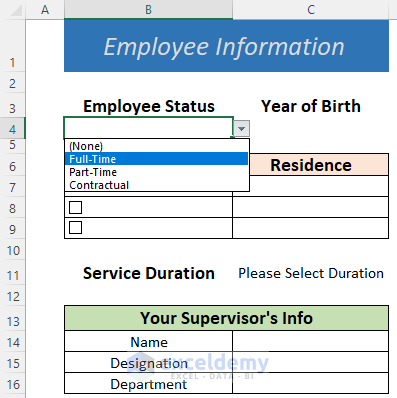
- You will see the names of your fellow employees based on their statuses. Select a year of birth and put a tick in the Check Box beside the name. The residence will be automatically updated.
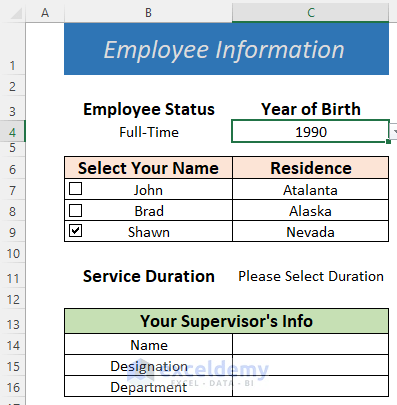
- Fill the other fields manually.
Example 2 – Creating a Fillable Data Entry Form in Excel
Steps:
- Insert some headings like in the following picture.

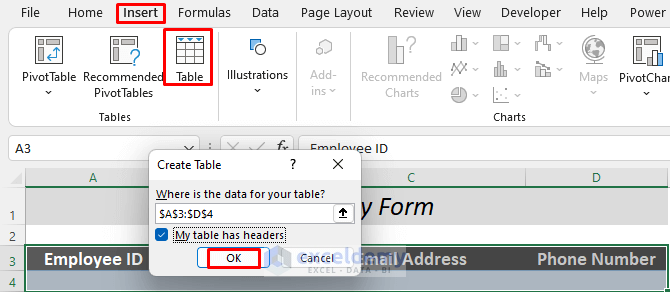
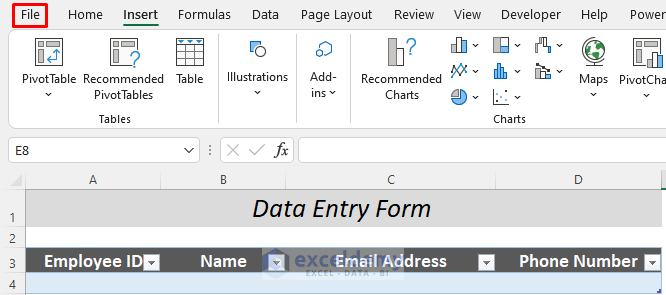
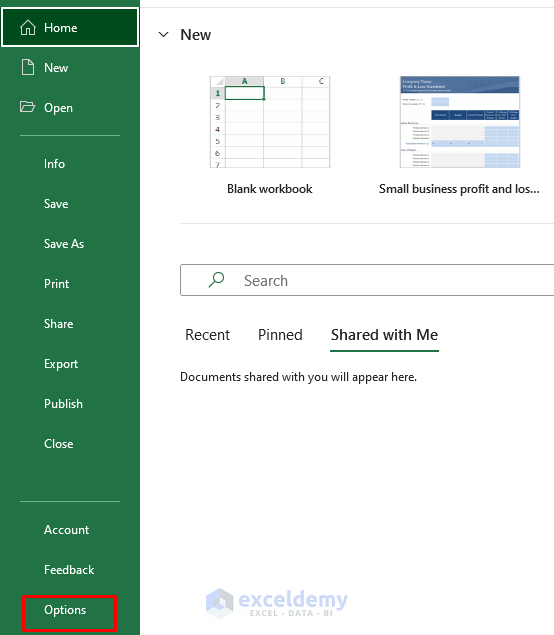
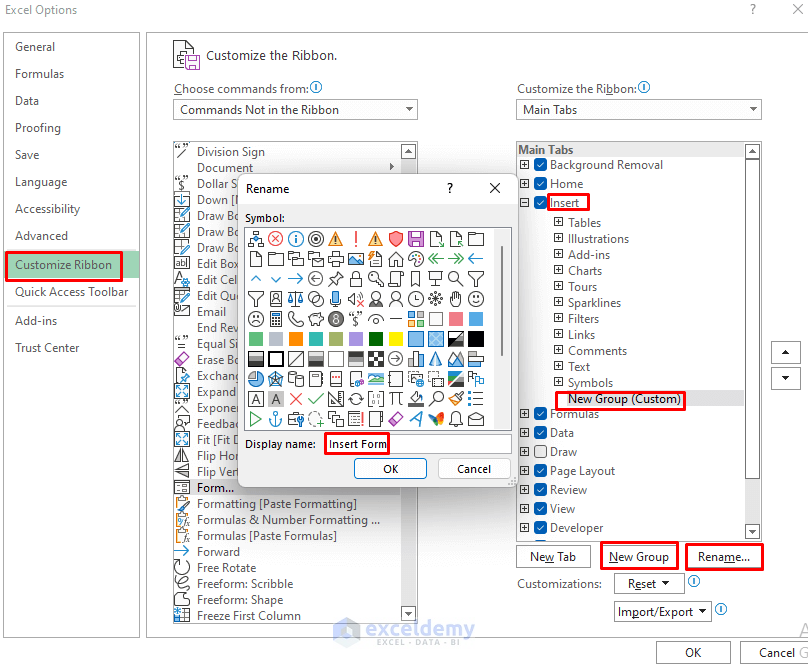
- Select Customized Ribbons and choose Insert (You can choose any other tab too).
- Go to New Group and select Rename…
- Name the group, such as Insert Form.
- Click OK.
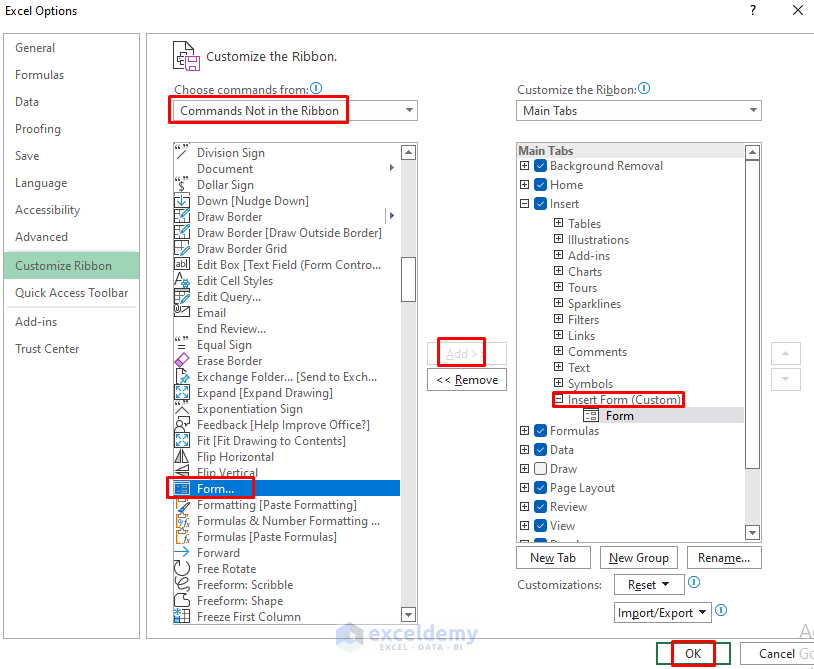
- Select Commands Not in the Ribbon from the Choose Command from section.
- Select Form and Add it to the Insert Form group that you created.
- Click OK.
- Select the header row and go to Insert and select Form.
- A dialog box will show up. Put the employee data in it and click on New.
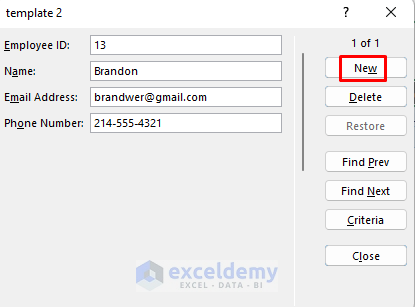
- By doing this, you add this employee data into the table.
- Enter another data point and click New.
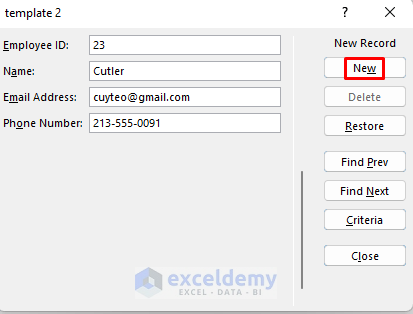
- This data also appears in the table.

Thus you can make a fillable data entry file in Excel.
Example 3 – Making a Fillable Form from Available Templates in Excel
Steps:

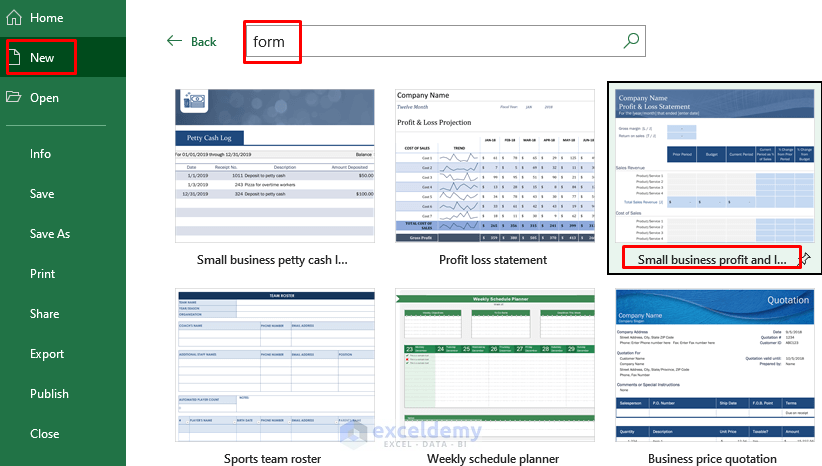
- Go to New and type form in the Search Bar.
- Press Enter to search and you will find a lot of templates.
- Select a template you like. We selected Small business profit and lossstatement.
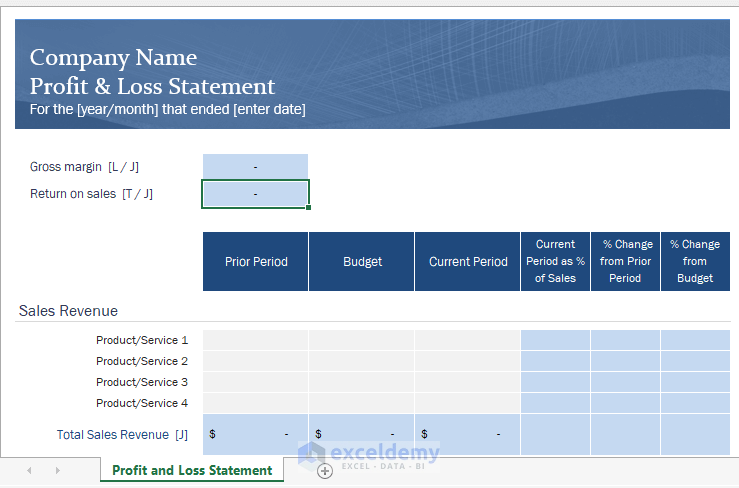
- You can use the template after it’s been downloaded.
Example 4 – Use Microsoft OneDrive to Make a Fillable Form
Steps:
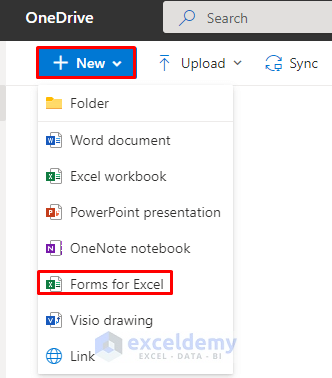
- Go to your OneDrive account and select New, then choose Forms for Excel
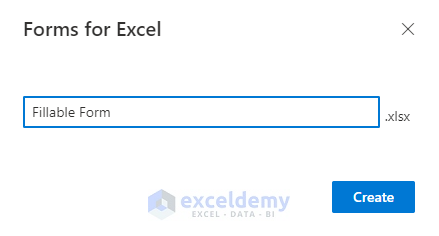
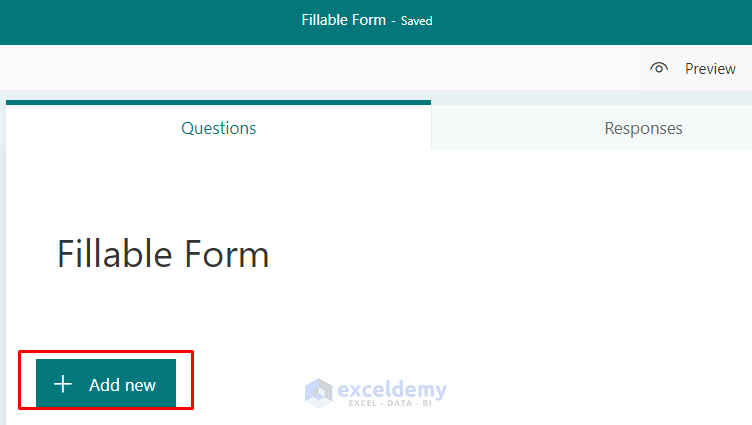
- Add a section by clicking Add new.
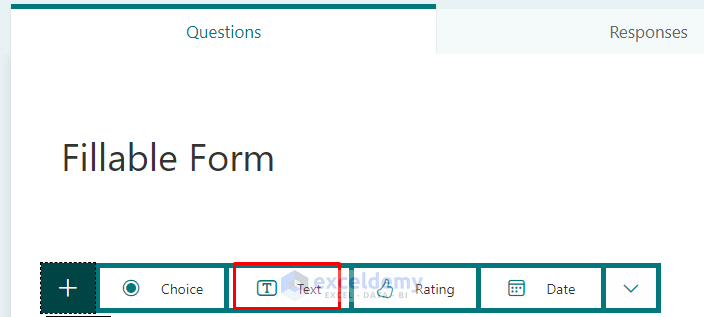
- You will see some form options. We want to insert names first so we selected Text.
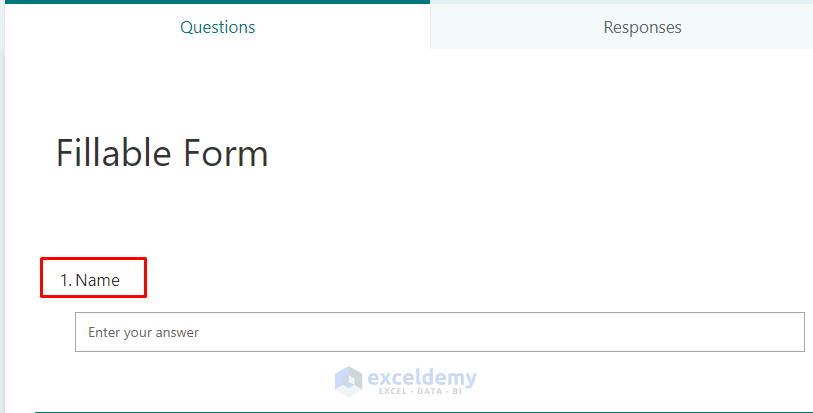
- Type Name as the number one option.
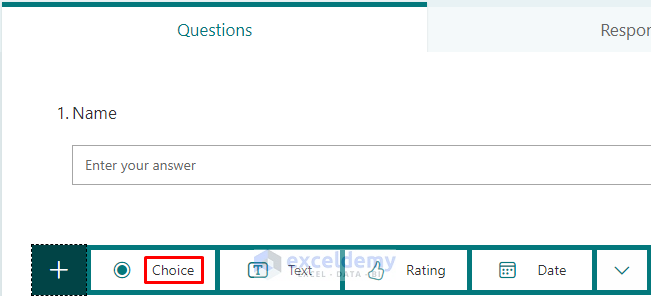
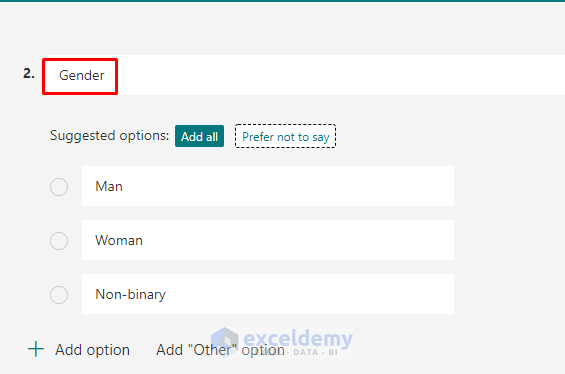
- Put other options. We want a Gender section so we chose Choice, where anyone can put their gender in the form. However, in Excel, we may not see the form in the same way.
- We added some other sections.
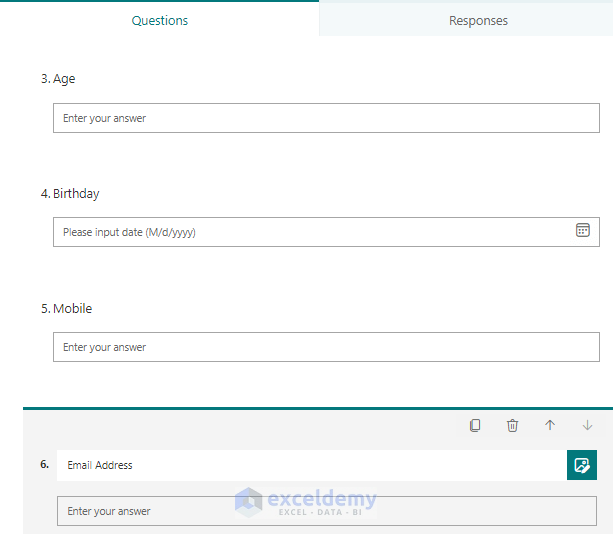
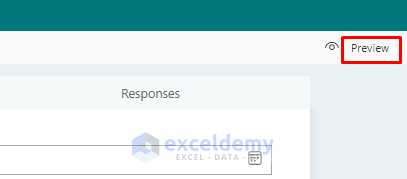
- You will see how the Fillable Form will look like to the user.
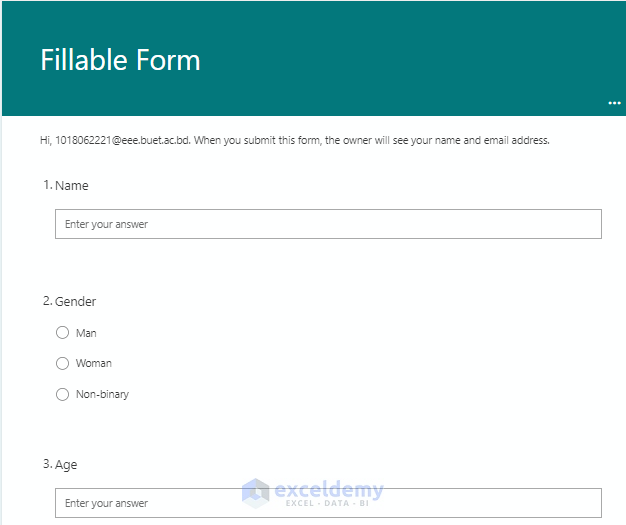
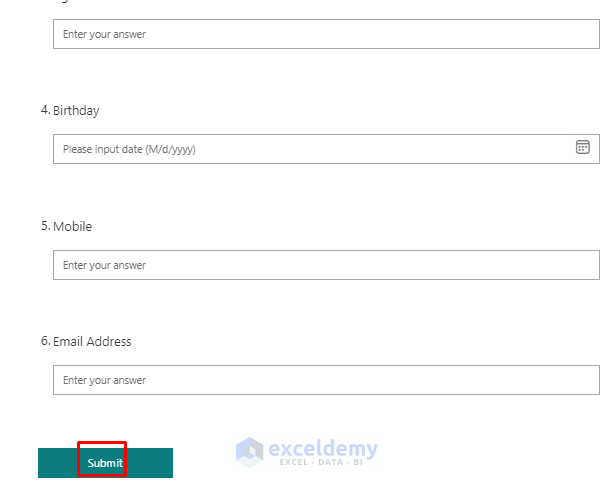
- Go to your Excel file and select the File.
- Select Open, choose OneDrive, and select Fillable Form.
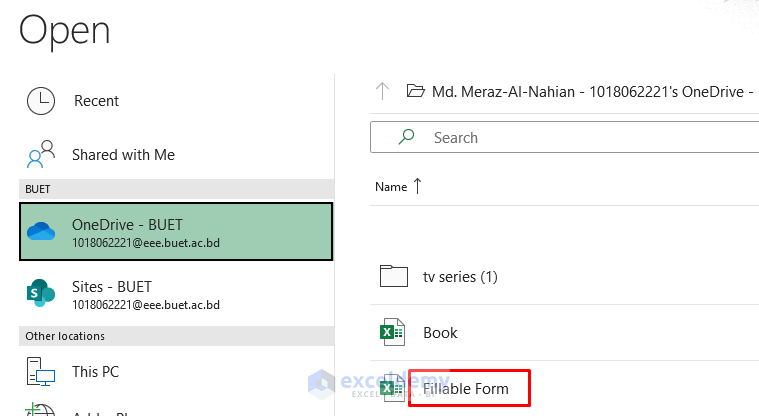
- You will see the fillable options appear in the Excel workbook as a table. There were some unnecessary columns in the table. We hid and deleted them for convenience.

- Put some data in the table.

Example 5 – Using Microsoft Office Account Apps to Make a Fillable Form
Steps:
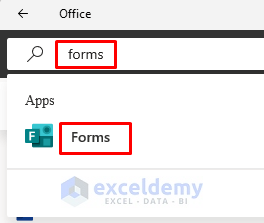
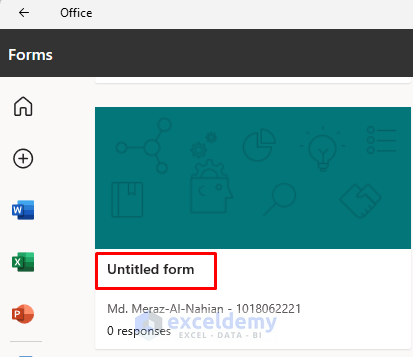
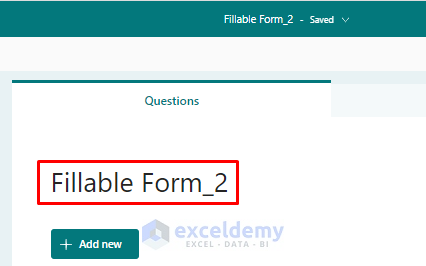
- The remaining process is the same as in the Previous Section.
Practice Section
We’ve provided some forms that you can test out.
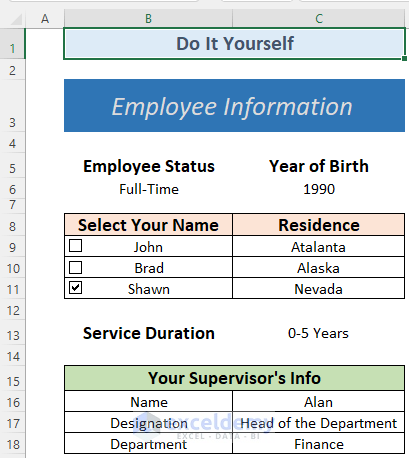
Download the Free Templates
Related Articles
- How to Create Data Entry Form in Excel
- How to Create an Autofill Form in Excel
- How to Create an Excel Data Entry Form Without a UserForm
- Create an Excel Data Entry Form That Includes Checkboxes
- How to Populate an Excel Spreadsheet from a Web Form
- How to Design Form in Excel
- How to Create Data Entry Form in Excel VBA
- How to Create a Printable Form in Excel
- How to Make an Excel Spreadsheet Look Like a Form
Save Saved Removed 0
Meraz Al Nahian
Md. Meraz Al Nahian has worked with the ExcelDemy project for over 1.5 years. He wrote 140+ articles for ExcelDemy. He also solved a lot of user problems and worked on dashboards. He is interested in data analysis, advanced Excel, statistics, and dashboards. He also likes to explore various Excel and VBA applications. He completed his graduation in Electrical & Electronic Engineering from Bangladesh University of Engineering & Technology (BUET). He enjoys exploring Excel-related features to gain efficiency. Read Full Bio
2 Comments
This is a great guide for creating fillable forms in Excel! It’s helpful for businesses and individuals who need to collect information from multiple people, making data management more efficient.


